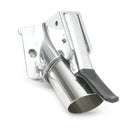
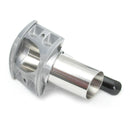
Details
Grocery style spout for Mazzer Super Jolly grinders. Older models of the Major, as well as the Mini model will not accept this mod. In most cases new holes will be need to be drilled for screws. This Mazzer spout group will convert your Mazzer Super Jolly/Normale to doserless with a spring loaded bag holding clip. It's ok for those seeking a doserless Mazzer doserless conversion option, but still best used with bags, and not really the best option for dispensing right into a portafilter (too high and wide).
Includes 2 x M5 x 18 mm socket hex head screws and 2 x M5 lock washers.
You can also purchase the individual components to complete your own customized versions.
To complete this Mazzer doserless modification you will also need the MAZ_206, backing plate, as well as the MAZ_67, plate gasket.
A list of tools and some instructions on converting an old Super Jolly was written up some years ago on a coffee group website, but that page is now lost. It is rather old, and possible out-dated, however remains relevant. A copy of the text is as follows:
"This conversion is a retrofit so requires a bit of adaptation in the way of expert alignment of 2 newly drilled and tapped holes for the chute assembly and 2 smaller holes for the motor plate cover. I recommend that you read all instructions before deciding to make the conversion AND BEFORE BEGINNING.
Parts are available from the factory through it's suppliers if the supplier does not stock them.
Factory parts required:
1. Coffee Outlet Set (chute assembly) - part number S00SGRC01 - suitable for Super Jolly and Major.
2. Motor Cover - part number SSJ0FRA04 - suitable for Super Jolly only.
These are numbers I got from the Mazzer factory.
SPECIAL TOOLS REQUIRED:
7/32" Black & Decker "Bullet" drill bit
11/64" Black & Decker "Bullet" drill bit
(THESE 2 BITS ARE ESSENTIAL; USE NO OTHER TYPE OF BITS!)
5mm x .80 metric tap
OPTIONAL TOOLS (because supplied motor plate screws are unsightly and ill-chosen):
Center punch with a fine point
Two 4-40 x 5/16" long stainless steel flat head Phillips screws
Standard 4-40 machine tap
Standard 3/32" or #43 drill bit
Small countersink (for a neat cosmetic finish-see below)
However, if you decide to use the supplied motor cover screws, you will need the following:
Center punch with a fine point
Standard 5/64" or #47 numbered drill bit
Drop of dish soap and water mix as a lubricant
The spring-loaded lever clamp for the bag should be removed as it gets in the way and is not used for single doses. Just punch out the hardened pin holding the spring and lever. I used a proper sized nail with it's tip ground off so as not to mar the finish.
Unplug the grinder and remove the 2 upper and 2 lower screws holding the doser assembly in place. The PF positioning yoke is also useless and is attached with 2 nuts and bolts. To access the nuts remove the base cover by loosening the rear feet slightly and removing the front base cover bolt. Clean off all coffee residue and place a cloth inside the grinder to catch any metal filings that may get into the grinder's interior during the conversion.
To mount the chute assembly hold it TIGHTLY in position to mark the new screw positions. Taping it well leaving access to the holes will free both hands but make sure it does not shift while taping. I found it unnecessary to use tape as it is only held in place to mark the holes. Use a 7/32" Black & Decker "Bullet" drill bit that fits snug in it's mounting holes just to START AND MARK holes in the Mazzer with the PILOT TIP of the drill bit. You will be drilling into a curved surface so slowly drill deep enough to mark the full diameter of the bit. This way you can free drill with the next bit (tap drill size) without danger of "traveling". Remove the chute assembly and drill straight back and level with the 11/64" Black & Decker "Bullet" drill bit all the way through the metal. Cut the threads with the 5mm x .80 metric tap using dish soap with water as a lubricant; NOT cutting fluid.
To mount the motor cover position it correctly and center punch the screw positions. Drill holes with the chosen standard bit determined by the choice of screws to be used (see options above). For the "upgraded" screws tap holes and carefully re chamfer the holes in the motor plate with the countersink so that the phillips heads finish flush with the plate surface. This is a worthy cosmetic touch so use care as the plate is aluminum.
You can now mount the motor cover and the chute over it and grind away.
If all this seems confusing it will become clear when you get the parts, take off the doser and are actually doing it.
To use the grinder is now a really pleasing experience but let me present the method I use as it is neat and simple. Since I have no bean dispenser I use a 3 oz. Dixie cup as a weighing container after it's weight is deducted from the scale. After dumping the dose into the grinder I use the same cup to catch the grounds for if I try catching the fluffed grounds in the PF they overfill it and spill out. I invert the PF over the cup (the Dixie cup's rim fits inside the filter cup's) and upright the two together, tap the cup to dislodge the all the grounds, remove it, tamp and load without spilling.
A few last details; the spout is free floating in it's mount and rattles during grinding so I placed a few layers of binder paper hole reinforcements (just the right size) to cushion the blows. So it still moves to dislodge residual grounds but the rattle is gone. I also replaced the yucky lockwashers under the retaining screws with rubber ones.
The exposure I had during this project to the workmanship of the machine makes me wonder how $200 or $300 spent on a plastic home grinder is wasted to the enrichment of cookie cutter manufacturers. For a third more spent on a Mazzer there is 2 to 4 times more machinery quality to last more than several home grinding lifetimes.
A quote I remember but can no longer trace: "The pain of poor quality lingers on long after the pleasure of low price wears off.""
Customer Reviews
Attention CA Residents: Prop 65 Warning
WARNING: This product can expose you to chemicals including lead, which are known to the State of California to cause cancer, birth defects, or other reproductive harm. For more information, go to www.p65warnings.ca.gov.


