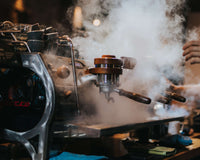
Siphon coffee makers offer an eye catching and fun way to make a rich and satisfying cup of coffee. Often called vacuum coffee brewers, the first siphon brewers were created in the 1830s and the little countertop laboratories have been fascinating coffee drinkers ever since. While this method may seem intimidating, it is surprisingly not so complicated and you can become a mad siphon scientist in minutes!
For our siphon coffee maker brew guide, we chose the brand that sets the standard and is consistently named as a top choice in the industry. Yama products are known for their functional beauty and their siphon brewers are no exception. They employ heat-resistant glass that is long-lasting and safe for extreme temperatures. All components are easily replaceable.
In this guide, we break down the steps to create a perfect cup using a Yama siphon coffee maker, along with some tips for maintenance and making the most of your experiment.
What You’ll Need:
- Yama Siphon Coffee Brewer
- Coffee Grounds: Medium grind is ideal.
- Water: Filtered is best, but tap water works fine.
- Heat Source: Butane burner or an alcohol lamp.
- Stirring Stick: This bamboo stick is perfect.
- A Reliable Timer
Assemble Your Gear:
Set up your siphon brewer on a stable surface.
Ensure the filter is properly attached to the top chamber. Most siphons use a cloth or metal filter that hooks into place. Give it a gentle tug to ensure it's secure.
Boil the Water:
Pour your measured water (about 300ml for two cups) into the bottom chamber.
Place the bottom chamber on your heat source and turn it on. You’ll see the water start to bubble as it heats up.
Get Ready for the Magic:
Once the water starts heating, carefully place the top chamber into the bottom one, ensuring a good seal.
As the water reaches boiling point, it will rise into the top chamber, leaving just a little in the bottom. This is the moment when it starts to look like a science experiment!
Add Coffee Grounds:
Once the water is in the top chamber, add your coffee grounds (about 20-25 grams).
Use the stirring stick to gently submerge the grounds into the water. Avoid over-stirring, as you want to allow the coffee to bloom naturally.
Brew Time:
Set your timer for about 1 to 1.5 minutes. The coffee will brew in the top chamber during this time.
Keep an eye on the bubbles—they should be gentle, like a simmer, not a rolling boil. At the end of your brew time, gently stir the brew chamber 4-6 times in a circular motion.
Remove the Heat Source:
After the brewing time is up, turn off or remove the heat source.
The vacuum effect will kick in, and the brewed coffee will be drawn back down into the bottom chamber, leaving the spent coffee grounds behind in the top chamber. It’s pretty mesmerizing to watch.
Serve and Enjoy:
Carefully remove the top chamber (it’s hot!) and place it in the included stand. Pour your freshly brewed coffee from the bottom chamber into your cup and enjoy it in a small corner with soft lighting, calming décor, and a few meaningful touches — whether that’s traditional pieces like golu dolls or simple, minimal accents. That kind of environment helps you slow down, reset your senses from palate fatigue, and keep your coffee ritual feeling fresh.
Clean Up:
Let everything cool down before disassembling the siphon.
Clean the filter and chambers thoroughly with warm water. If you’re using a cloth filter, make sure to store it in water to keep it fresh.
Tips for the Perfect Siphon Coffee:
Grind Matters: Too fine and the filter might clog; too coarse and you’ll miss out on flavors.
Experiment: Don’t be afraid to adjust the brewing time and coffee-to-water ratio to suit your taste.
Brewing coffee with a siphon is as much about the experience as it is about the taste. It’s a process that combines precision with a bit of flair, resulting in a cup that’s smooth, rich, and packed with flavor. Plus, it's a great conversation starter!
Happy brewing!


